How to edit Posted Invoices and Journals
It is possible to edit invoices after they have been issued and journals after they have been posted. The objective of this functionality is to allow users the possibility to edit the most important elements of posted invoices and journals.
In order to use this functionality, it must first be activated in the company settings. To activate this setting, go to View - Settings - Company - Settings per Module - Sales and Invoicing. Select Edit posted invoices and journals and click OK to save the setting.
You can now access the functionality by going to File - Database Utilities - Edit posted invoices and journals. You will be required to enter your regular username and password for Mamut Business Software in order to authenticate yourself. Note that your user profile must be defined as Super user to gain access to this functionality.
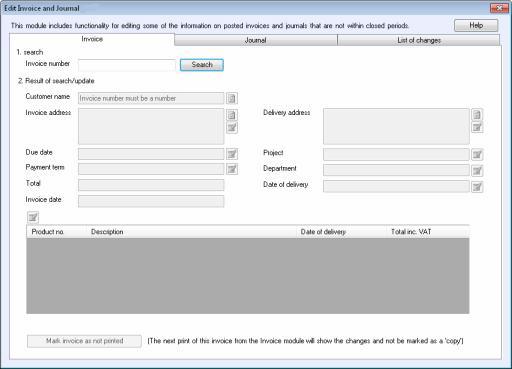
Once you have activated this setting and authenticated yourself, you will be able to access a simple and user friendly window with three tabs: Invoice, Journal and List of changes.
Under the Invoice tab, you are able to edit the following information:
![]() Note! It is only possible to edit posted
invoices; orders can be adjusted in the order module.
Note! It is only possible to edit posted
invoices; orders can be adjusted in the order module.
- Customer name (this information is taken from the Contact Register, but can be changed for this single invoice)
- Invoice address
- Due date
- Payment term (this will result in a new due date)
- Delivery address
- Project
- Department
- Date of delivery
- Invoice
lines:
- Description
- Date of delivery
Under the Journal tab, you are able to edit the following information:
![]() Note! Only journals belonging to periods
that have not been closed can be edited.
Note! Only journals belonging to periods
that have not been closed can be edited.
- Period (not one that has been closed)
- Date
- Journal
lines:
- Project
- Department
- Due date
- Description
- VAT report code
- N/C (but only to a N/C with the same VAT-handling as the existing one)
Once you have edited the desired information, the existing journal or invoice will be updated, and the changes will be logged within the List of changes tab. You are also able to export this information to Microsoft Excel.
How to edit posted invoices and journals
- Select File – Database Utilities – Edit posted invoices and journals.
- You will now be prompted for your username and password, enter your standard Mamut Business Software details to proceed.
- Select the Invoice
or Journal tab.
- Search for the relevant invoice/journal: Enter Invoice number in the Invoice tab, or
Journal Entry no., Journal
Type and Fiscal year in
the Journal tab, then click Search
to identify the existing invoice/journal that you wish to edit.
Note: When entering the Journal Entry no., please only enter the number itself, not the prefix with the journal type. - Edit the fields that you wish to change by clicking
the Edit button to the right of
the field and updating the information within the window that is displayed.
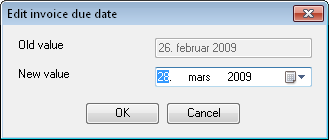
- Click OK to save the changes to the invoice/journal.
- For invoices, select Mark the invoice as not printed so that the next print of this invoice from the invoice module will not be marked as copy.
![]() Your updates have now been completed and
will be present on the respective invoice/journal. You can now view a
list of the changes you have made in the List
of changes tab. Here you can also select if you wish to Export
to Microsoft Excel.
Your updates have now been completed and
will be present on the respective invoice/journal. You can now view a
list of the changes you have made in the List
of changes tab. Here you can also select if you wish to Export
to Microsoft Excel.
Read more about: