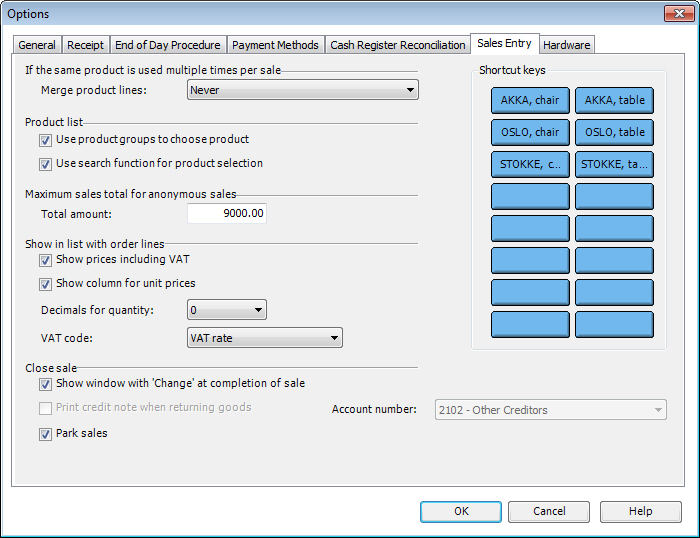
On the Sales Entry tab, you will find all settings relating to the sales entry process in Mamut Point of Sale. The settings can be accessed via Administration - Options - Sales Entry.
Entry of the same product multiple times
Merge product lines: Select which method you want to use for displaying sales of multiple units of the same product. For example, if you click twice on a shortcut key or bar code reader, the products will show on one line with a quantity of 2 if you have selected options Always or When products are registered after each other here.
Product list
Use product groups to choose product: When you click/press the Product button a window opens from which you can find the required product. Selecting this option will organise the products with buttons for product groups, the same way they are organised in your accounting system. If you do not select this setting, the product list opens instead.
Use search function for product selection: Activates a search bar in the Select product window which can be used when registering sales. The search bar is active when the window is opened.
Maximum sales total for anonymous sales
Total amount: A number of businesses wish, or are required by law, to have a maximum limit for sales to anonymous customers. After this limit is reached, sales need to be allocated to a registered customer. This option lets you set the maximum sales amount. Selecting 0,00 will inactivate the function.
Show in list with order lines
Show prices including VAT: The setting lets you choose whether to display the prices in the sales window with or without VAT.
Show column for unit prices: By default, the system displays a separate column for the unit price. You can turn this function off here.
Decimals for quantity: If you sell products in less than full units you can specify the number of decimals here.
VAT code: If you do not want to display the VAT code in the sales window you can select Not shown.
Close sale
Show window with 'Change' at completion of sale: Payment concludes the sale. By default, a separate window will show information regarding how much change the customer is due. This window has to be closed manually. You can select not to show it, in which case the system will take you directly to a new sale. The amount the customer is due is shown in the payment window, and in the customer display, if connected.
Print credit note when returning goods: Credit notes can be printed automatically when handling a return. If the setting is active, you will also need to select an account to define where money owed to customers in the form of credit notes, should be posted. The account is retrieved from the control account in the accounting system.
Park sales: Enables the possibility of parking a sale. After parking a sale, it can easily be retrieved and paid. This setting is activated by default.
Shortcut keys
Here you can decide on up to 16 shortcut keys for sales entry. Click on a key to enter a product for the shortcut key. If you have longer product names you should shorten the name so that the text will fit on the shortcut key.
The size of the keys in the Sales Entry window will vary according to how many shortcut keys you have assigned:
If you have fewer than 5 shortcuts the keys will cover the width of four smallest keys (number pad) and each key will fit a maximum of 20 characters.
If you have between 5 and 8 assigned shortcuts the key width will be that of two of the smallest keys and each key will fit a maximum of 10 characters.
If you have between 9 and 16 assigned shortcuts the keys will have room for a maximum of 6 characters.
How to add a shortcut key:
Click Administration - Options - Sales Entry.
Click on one of the blue rectangles to the right in
the window.
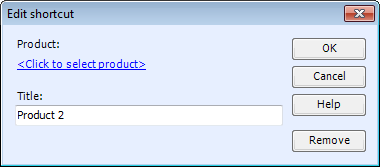
In the Edit shortcut window, click link Click to select product.
Select a product from the list and click Select.
Click OK.
 The shortcut key will be added to the right
of the main sales registration window.
The shortcut key will be added to the right
of the main sales registration window.
Read more about: