Generating Debt Collection Files
View - Accounting - Debt
collection ![]()
Clicking on the Debt collection button in the Customer ledger module will start a wizard for the generation of debt collection files. Before you can start using the exporting of debt collection functionality you need to enter into an agreement with a debt collection company and adjust the debt collection settings in Mamut.
The transfer of outstanding accounts receivables to debt collection is done by generating debt collection files in the Customer ledger. The files contain information on your outstanding payments from customers that you want your debt collection company to collect.
To be able to send accounts receivables to debt collection, a notice of debt collection due for payment must have been sent out.
- Go to View - Accounting - Debt Collection or click the Debt Collection button in the Customer ledger module.
- Make the selections you require to limit the number
of overdue accounts suggested for debt collection.
You can set one or more of the following selections:
Type of contact: Select a customer type.
Customer: Select a customer
Run date: Select a date for creating a debt collection file.
Click Filter if you wish to make a more advanced selection.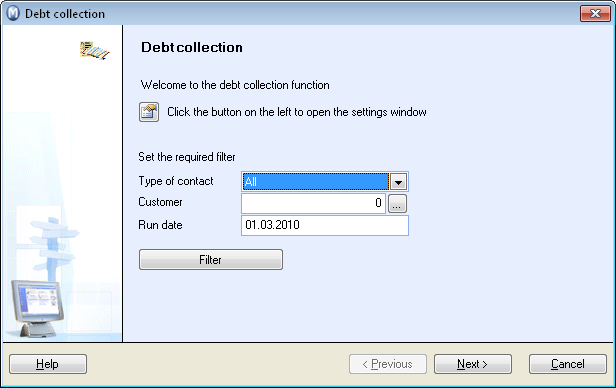
- Click Next to view the overdue accounts suggested based on your selection. You can also uncheck lines with suggested overdue accounts. Overdue accounts you have unchecked will not be included in the Debt collection file on this occasion.
- Click Next if you are happy with the overdue accounts suggested. You will then see a preview of the Debt Collection List, which you can print by clicking Print report.
- You can click Previous if you want to edit the selection and start from step 3.
- Select the directory where the debt collection files are saved.
- You can also deselect the option to send debt collection files to your debt collection partner via e-mail. If you have entered your debt collection partner's e-mail address in the company settings for debt collection, this option will be selected automatically.
- Click Next to generate the files.
- Click Finish in order to update the status of the ledger items to Sent to Debt collection.
![]() You have now generated the debt collection
files based on your selection.
You have now generated the debt collection
files based on your selection.
![]() Note! If you
for some reason must resend a debt collection file to your debt collection
partner, you must restore the file from the file directory. You cannot
generate the file again since the ledger items have been transferred to
the status Sent to Debt collection
in the program. You can restore the files via the debt collection settings.
Read more Settings for Debt Collection.
Note! If you
for some reason must resend a debt collection file to your debt collection
partner, you must restore the file from the file directory. You cannot
generate the file again since the ledger items have been transferred to
the status Sent to Debt collection
in the program. You can restore the files via the debt collection settings.
Read more Settings for Debt Collection.
Read more about: