Contact Management Tab: Settings
View - Contacts - Contact Management - Settings ![]()
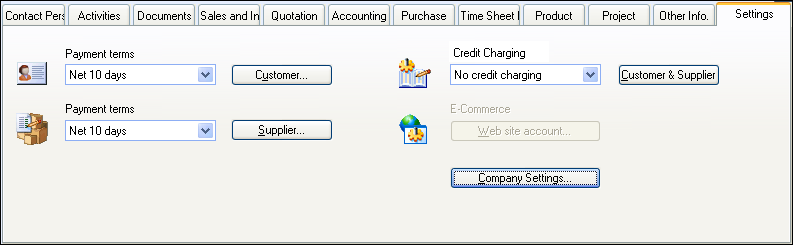
The Settings tab allows you to define the settings for Customer, Supplier, Accounts ledger and your Website account. The tab can be accessed by clicking View - Contacts - Contact Management. You are able to tailor each contact. The information you enter here is important, as it is transferred to the Sales and Invoicing module when you create a new order for a contact.
![]() Note! What settings are available depends
on whether or not the contact is a customer or supplier.
Note! What settings are available depends
on whether or not the contact is a customer or supplier.
Customer
Click the Customer button to specify the settings for contacts who have customer status.
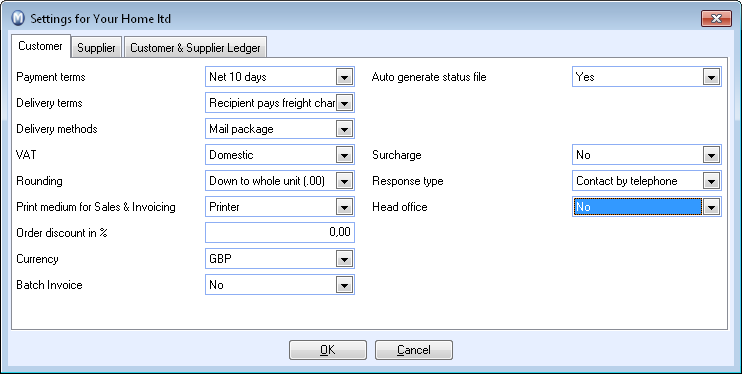
Payment terms: Select which payment terms should apply to the customer.
Delivery terms: Select which delivery terms should apply to the customer.
Delivery methods: Select which delivery methods should apply to the customer.
VAT: Select which form of VAT applies to the customer.
Rounding: Select in which way you want amounts to be rounded.
![]() Tip! The above-mentioned settings will
be used as default values when you create an order for the customer.
Tip! The above-mentioned settings will
be used as default values when you create an order for the customer.
Print medium for Sales and Invoicing: Select how the customer will receive Sales orders/Invoices from the drop-down list. This setting is relevant if you have selected Transfer from the contact from the drop-down list Print medium for Sales & Invoicing in the user settings for reports. If you want to e-mail the Sales order/Invoice you need to use Microsoft Outlook® and to have a registered e-mail account for the customer.
Order discount in %: To give the contact a flat discount on all orders, enter the percentage in the field Order discount in %. The percentage you enter here will then automatically be deducted from the price of an order. Read more in Discounts.
Currency: Decide in which currency you would like to invoice the customer. The currency choice you make here is the currency chosen for your Company database. The currency will automatically be used on orders you create in the Sales and Invoicing module. Note that you can override the contact’s currency on orders in the Sales and Invoicing module.
Batch Invoice: If you select Yes in the Batch Invoice drop-down list, when you create a new order in the Sales and Invoicing module, the order's status will be set to Unprocessed batch order. If you select No in the Batch order drop-down list when you create a new order in the Sales and Invoicing module, the order's status will simply be set to Unprocessed order. Note that you can override these settings on individual orders.
Auto generate status file: It is recommended that you select Yes in this drop-down list.
Surcharge: Select whether or not the customer should pay a Surcharge.
Response type: Select the response type that applies to the customer; choose from the drop-down list.
Head office: If several of your contacts are part of the same chain, you may want to invoice head office for all sales. If the contact constitutes one such Head office, select Yes from the drop-down list. Other customers can then be set up with the Head office.
Supplier
If the contact is marked as supplier, the Supplier button will be active. Here, you can state the terms for any purchases you make from the supplier.
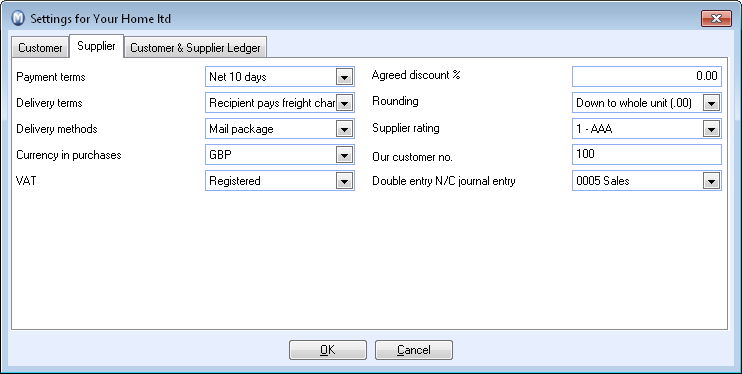
Payment terms: Select which payment terms should be applied.
Delivery terms: Select which delivery terms should be applied.
Delivery methods: Select which delivery methods should be applied.
Currency in purchases: Select which currency should be used when registering a purchase.
VAT: Select which form of VAT should be applied.
![]() Note! Each new purchase from this supplier
will be registered under these terms. You can however override the information
for each new purchase.
Note! Each new purchase from this supplier
will be registered under these terms. You can however override the information
for each new purchase.
Agreed discount %: If you have a fixed discount with the supplier, enter the amount in this field. The discount you enter will be automatically deducted from the purchase total when you register a new purchase.
Rounding: Select in which way you want amounts rounded.
Supplier rating: If you have two suppliers for the same product, you will naturally wish to order from the supplier who gives you the best terms; therefore, a field is set up for supplier rating. Here you can select from the highest A grade, 1 AAA to the lowest, 5C. The evaluation is available in the Purchase module in those cases where you have several suppliers to choose from. Note that you can change the values shown by right-clicking in the drop-down list and selecting Change in properties register.
Our customer no.: Enter your own customer number in the field as an easy reference for the supplier.
Double entry N/C journal entry: From this drop-down list you can select the account to use when registering a purchase invoice from the supplier from the chart of accounts.
Customer & Supplier Ledger
In the Customer & Supplier Ledger settings you can specify customer and supplier credit details; you also enter if the customer or supplier should be sent payment reminders.
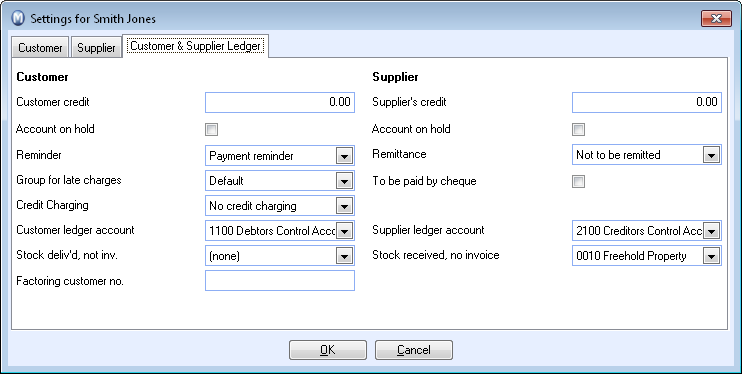
Customer credit and Supplier's credit: Use these drop-down lists to limit your customer and supplier credit. You will be notified that the credit limit has been exceeded if you attempt to register/invoice an order/delivery.
Account on hold: You can select whether a customer's or supplier's account should be put on hold by selecting this check box. Accounts on hold will show a symbol for credit block in their contact card and in the Customer & Supplier Ledger's List of Suppliers and Customer list. You will receive a notification letting you know the account is on hold when trying to register orders or make purchases.
Reminder: Select Payment reminder if you want to send payment reminders to the customer. Select Factoring from the drop-down list if the customers' accounts receivables should be sent to a factoring company.
Group for late charges: Select to which group for late charges the customer belongs.
Credit Charges: Choose whether or not to credit charge the customer.
Remittance: Select the default payment for purchases from this supplier. If you choose To be remitted the default payment is remittance and bank files for remittance will contain the items of this supplier if all settings are used correctly. Read more in Getting Started with Automatic Remittance
To be paid by cheque: Select the check box if the amount will be paid by cheque.
Customer ledger account and Supplier ledger account: Customer payments are usually credited to account 1100 the Debtors control account, and supplier payments to account 2100 the Creditors control account. You can override these if other accounts apply.
Stock delivered, not invoiced: Select which account should be used for stock that has not been invoiced.
Factoring customer no.: In this field you can enter the customer's factoring number.
![]() Tip! You can change default settings
by right-clicking on several of the drop-down lists and selecting Change in properties register.
Tip! You can change default settings
by right-clicking on several of the drop-down lists and selecting Change in properties register.
Website account
Click this button in order to define the contact's access to password-protected websites. Users will generally already have been approved via the process Get website data; however, you can change any approval or rejection here. Read more in Web Site Account.
Company Settings
Click this button in order to open the company settings. Read more in Company Settings.
Read more about:
Contact Settings for Website Account